- 05 Oct 2023
- 4 Minutes to read
- Print
- DarkLight
- PDF
Order assistant
- Updated on 05 Oct 2023
- 4 Minutes to read
- Print
- DarkLight
- PDF
The Order Assistant helps you with an efficient order flow, while minimizing the chance of picking errors. In addition, it works just as well on tablets as on PC/Mac.
Intro and easy setup
Layout
When you launch the app for the first time, you'll need to set up shipping methods and printers. If you have previously used version 1 of the app (Simple order management), the setup will already be ready.

Inside the Simple Order Management menu, you'll see a gear in the top right corner. This is the settings menu.
Please note that the integration with Logistra must be ready for use before you can access this menu.
Quality assurance
Choose whether quality control should automatically start on each order. Quality control gives you the opportunity to scan/confirm that all items in the order have been picked before you set it to shipped.
If you choose not to start the control count for each order, it is possible to activate it manually when processing the order.

Printer selection
Here you choose which printers to use in the service. If your store only uses one printer, just choose this one.

Choice of shipping methods
Shipping methods are set up in the same way as printers. Check the shipping methods you want to use in the service. If you have a choice for "Picked up in store", this must also be chosen as a shipping method.
PS! The "Pick up in store" shipping method will not print shipping labels.

Custom
- Print packing slip
- Gather all products in one order
- Scan barcode on picklist
- Perform quality control
- Choose your shipping method
- Press "Send"
- You're done – move on to or scan your next order!
In the Orders window, a list of orders is displayed on the left and statistics at the bottom. Both orders and statistics are based on the selected order status. You can toggle between order status in the top right corner.
The search bar on this page is used both to scan a picking list and manually search for orders or customer names.
Note that the search field only searches within the selected order status.


You can click anywhere on the order to start order processing or scan your desired barcode. Barcode scanning starts order processing automatically.
The only exception is if you click on the green information icon. If you click on this icon, you will be submitted to the order itself.

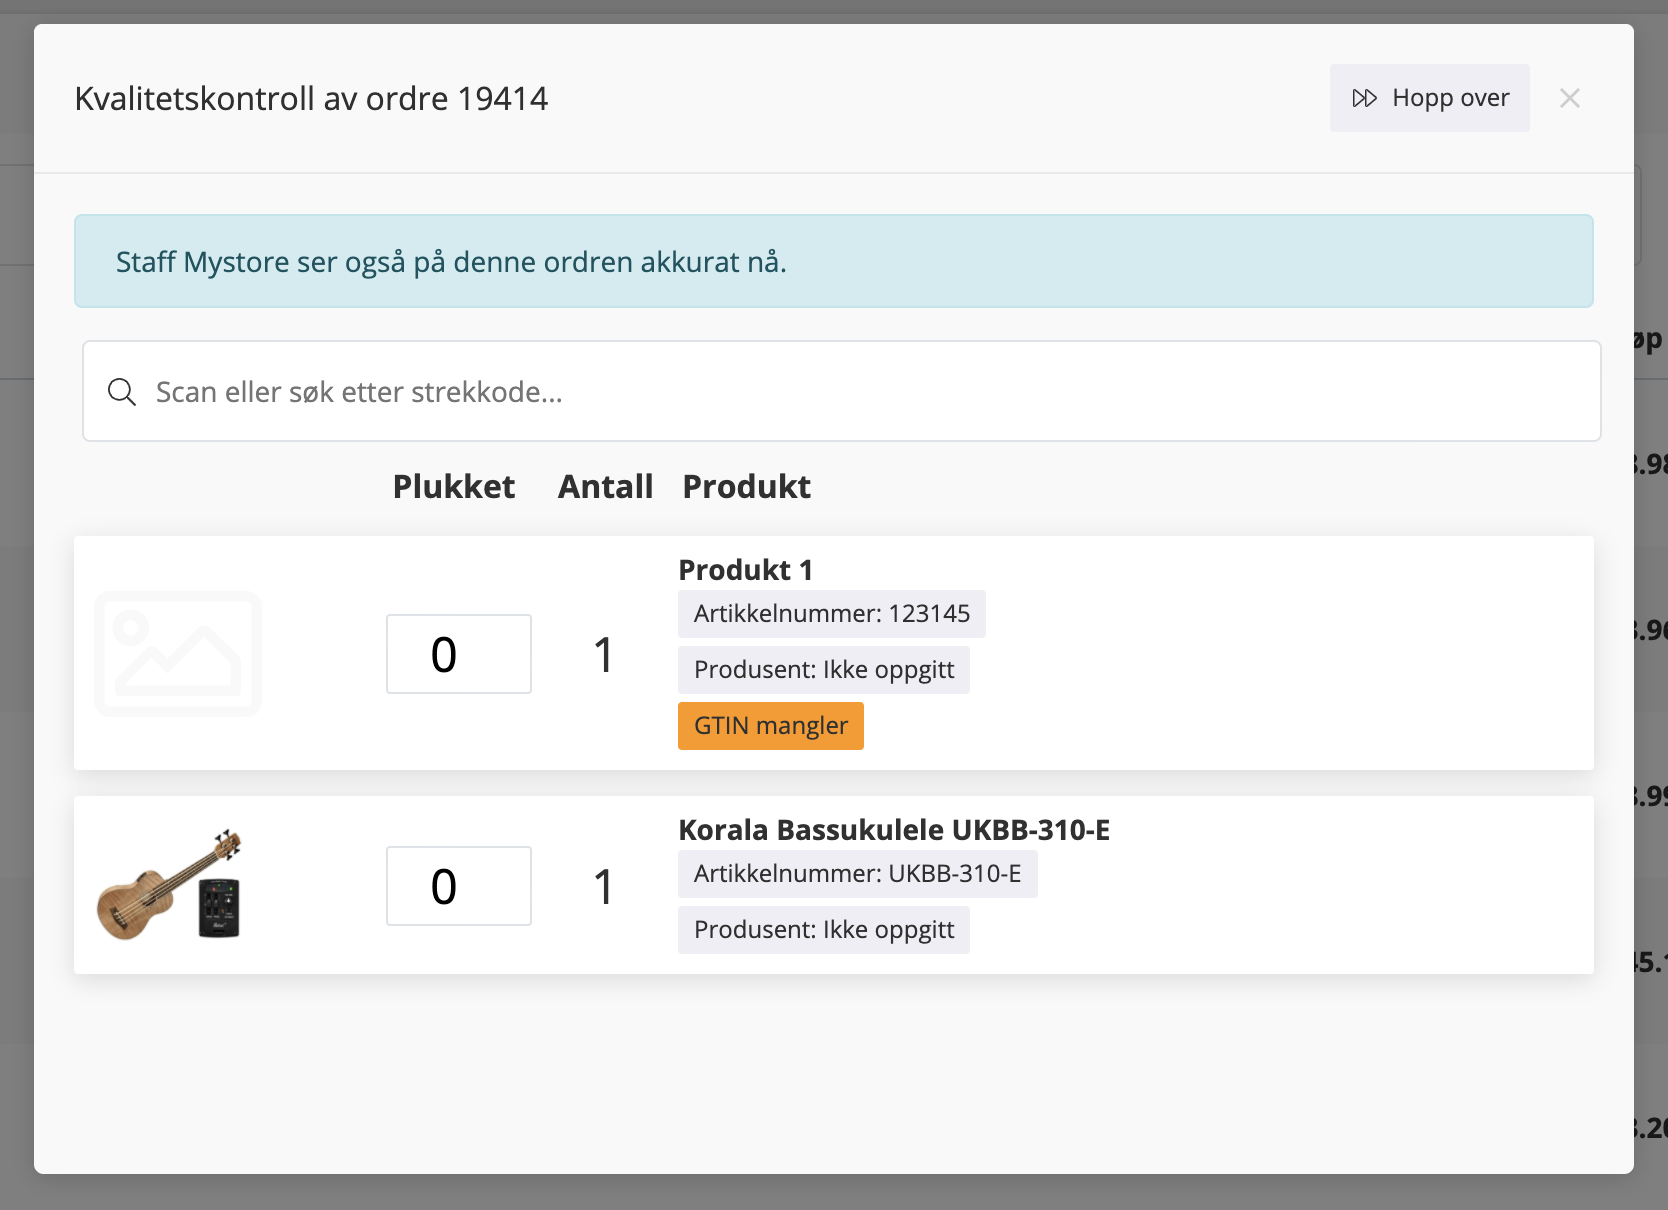
After activating the order process, a new window will appear. If you have selected quality control, you will see a window where all products in the order are listed. Read more about quality control here.
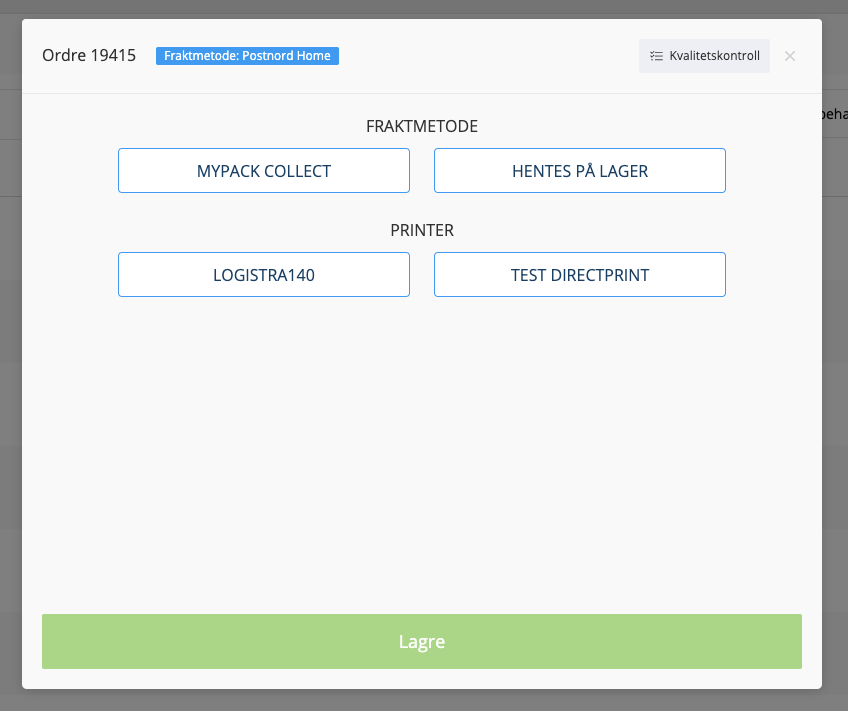
The next step in the order process is the choice of shipping method and printer. If you have set up the service with multiple shipping methods, you must first choose the correct shipping for the order you are processing.
The selected shipping method on the order can be seen at the top of the window.
If you have several printers, you must then choose which printer you want to print the label on.
If the service is set up with only one shipping method or one printer, you do not have to make any choices.
After selecting a delivery method, you can adjust the number of pieces on your shipment.
Increasing the number will open an additional setting where the weight can be adjusted, see bottom image.
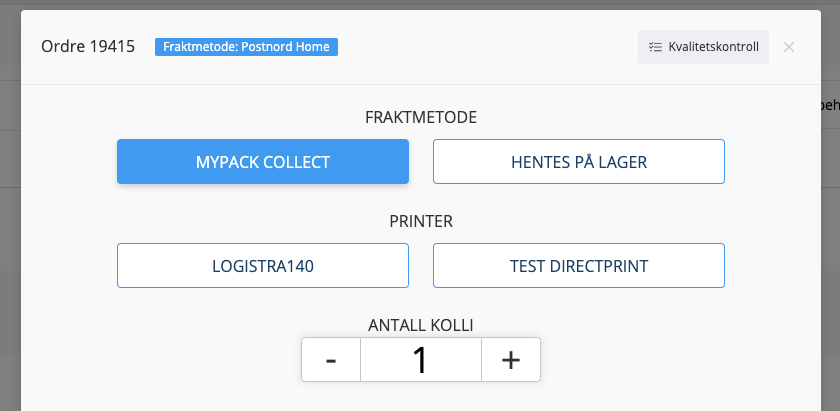

Adjusting the "number of pieces" will provide several choices for adjusting the weight of each package.
When the order is completed, you will be able to see the status of each step, while any messages are displayed in the upper right.
Each, both confirmation of completed trades and any error messages will be displayed.
If you click on a message, you will be taken to the order.
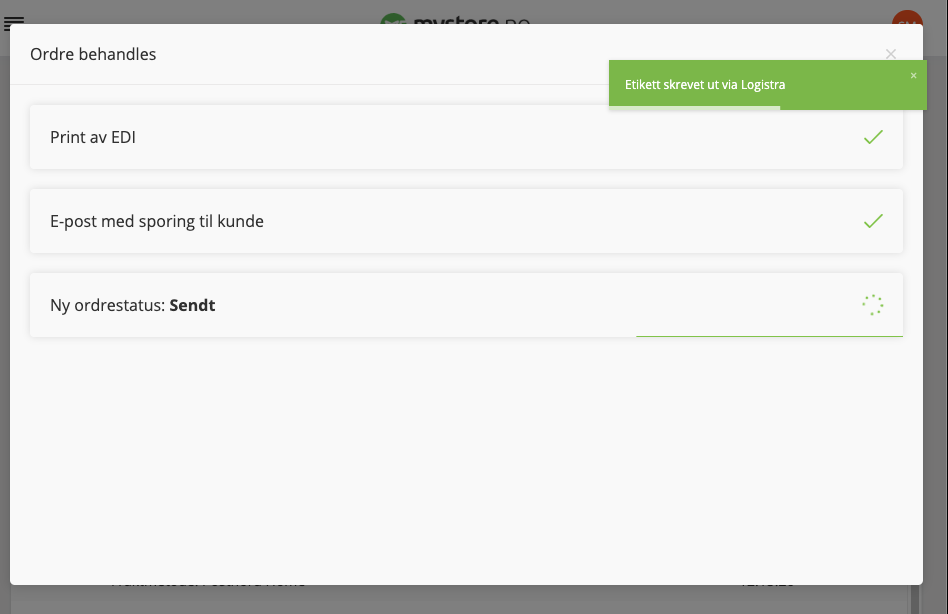
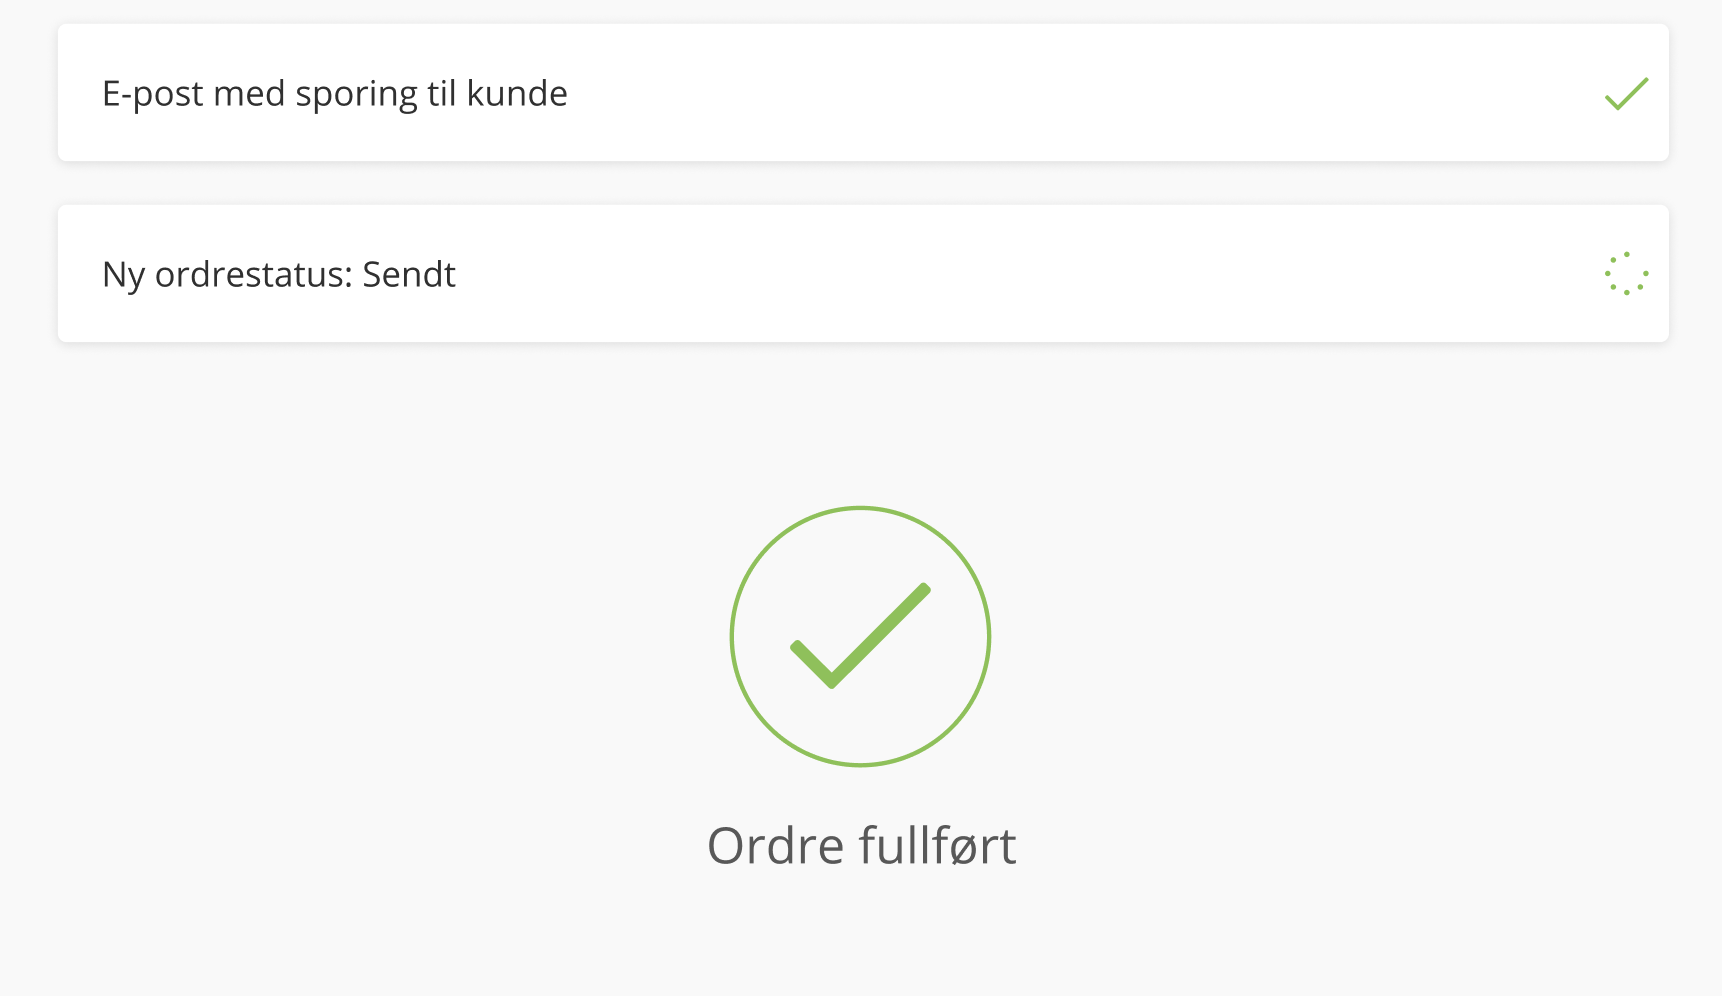
After the order has been processed, you will be sent back to the overview and ready to process the next order.
Quality assurance
If you choose to use quality control, for each order you will have to scan, or confirm, all the items that will accompany the order. This is done by scanning the barcode on the item or pressing on the product itself in the listing.
View
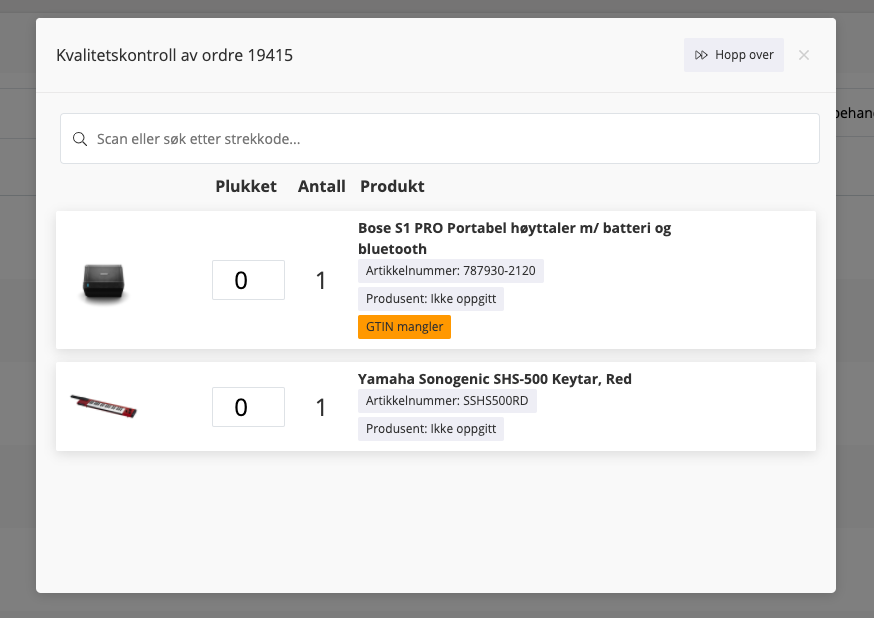
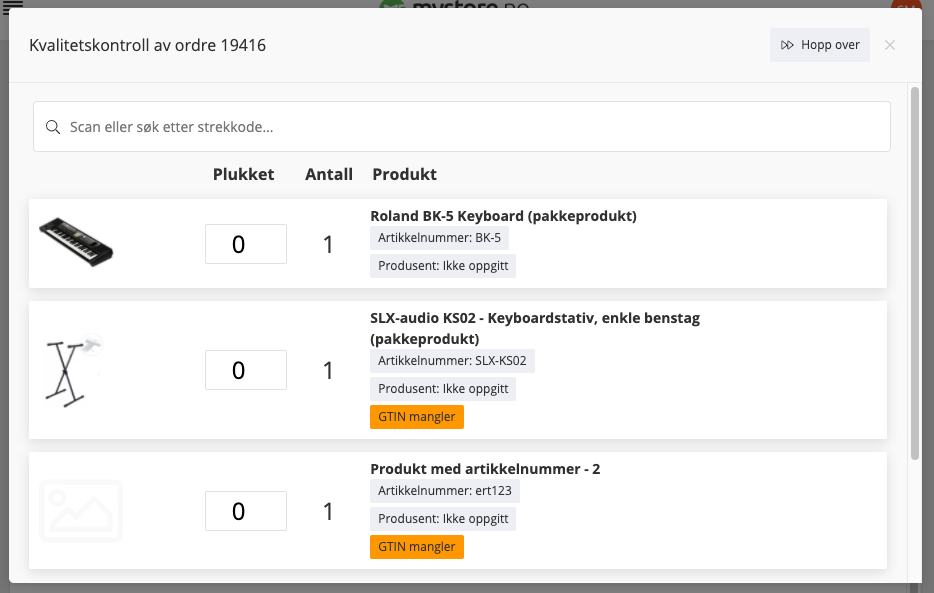
In the list of items you will see the product picture, the quantity that has been picked / checked, the total number that should be in the order and information about the product.
The product name, article number and manufacturer are shown here. If the product lacks a GTIN (barcode), this will be indicated in orange, so you can easily verify the item manually.
Sorting the list
After scanning/checking a product line, it will move to the bottom, so that the remaining product lines are always on top.
When a line item is finished, you will have the option to check it again.

Feedback on scanning
Once an item has been scanned, a confirmation will appear on the right:

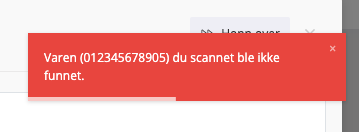
If you scan an item that is not on the order, you will get a red alert on the right informing about this:
Skip quality control
You can skip a quality check at any time by pressing the "Skip" button in the upper right corner:

Collision detection
Collision detection notifies you if another user is on the same order, so you don't accidentally end up processing the order twice.
If two users are on one order, a banner will appear at the top:
